How to Take Pictures Around a Campfire
How to Take Better Photos Around a Campfire
Thanks to the gorgeous rustic backdrops, camping trips provide great photo opportunities — well, except for that complicated campfire issue. Strange lighting, tricky exposure settings, and unavoidable weather conditions can make it difficult to take frame-worthy photographs around a campfire. Hoping to snap some pictures during your next outdoor adventure? Here, five essentials points to consider as you click:
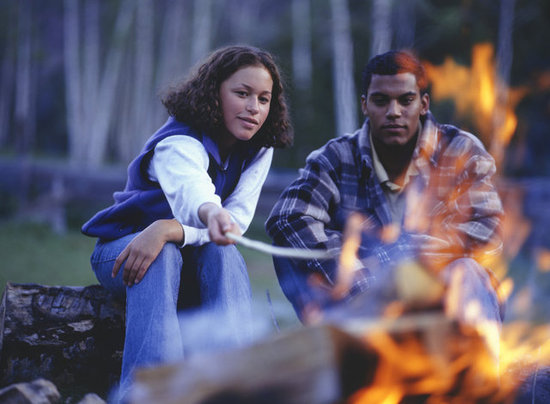
- Time of day — First, decide what kind of mood you'd like to create. One of the most optimal times for shooting? Just after sunset. Still, photos taken in a bit of daylight can make for better lighting conditions and interesting background details. That way, you're not stuck with a pictures of floating faces beside the fire.
- Setup — Before you begin, focus on your subjects' faces to judge the exposure. Ideally, you'd like their faces to be lit evenly by the fire so that you can avoid awkward shadows. Easy tip: for additional lighting, place lanterns in strategic positions outside the frame.
- Flash — For a moodier effect and a flame-centered focus, you'll want to turn off the flash. However, if you do use a flash, then you'll be bringing extra light to your subject so that the exposure levels for the faces and the fire are more balanced.
- Composition — Consider the placement of people, the inclusion of surrounding objects, and the distance between your subjects and the fire. If your subjects are too close to the fire, then the exposure may be off, but if they're too far away, then their faces may turn out as silhouettes.
- Shutter speed — Don't be afraid to toy around with your ISO, aperture, and shutter-speed settings. A slower shutter speed will help to blur the campfire, while a quicker speed can give a crisp, clearer look to the flames.
Tell us: do you have any tips for shooting around a campfire?
Source: Thinkstock


