What Is the iPhone 4S HDR Setting?
The Dos and Don'ts of HDR iPhone Photography
Each iPhone 4S and 5 camera is equipped with a really cool HDR setting that can dramatically improve your photos. HDR stands for high dynamic range, and it essentially takes a series of images, each shot with a different exposure from darkest to lightest. HDR combines the best parts of the three overexposed, underexposed, and balanced shots to create a dramatic image with beautiful shadowing and highlights.

Do: use HDR for close-ups and outdoor portraits.
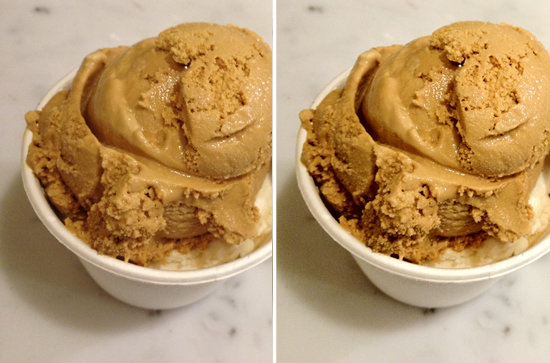
Compare the normal photo of ice cream on the left with the HDR image on the right. Oftentimes, HDR images look crisper, and colors appear much richer than the normal photo. Try HDR for close-ups and outdoor portraits, especially if the subject and the background have a harsh lightening difference. Click here to read more about HDR.

Don't: use HDR for moving objects or when you are moving.
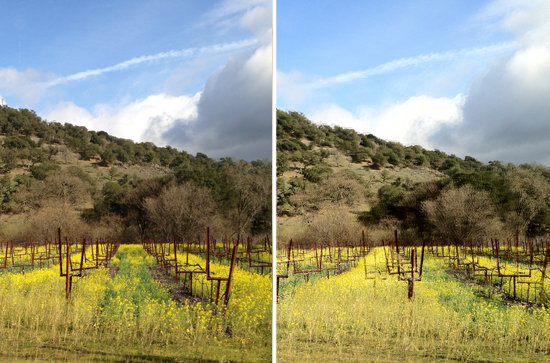
In the above vineyard image, taken from a moving car, the normal photo on the left is the better option. The HDR setting will result in blurry images when the photographer is moving or capturing a moving object.
Don't: use HDR in bright, sunlit conditions.
Forgo HDR when shooting in direct sunlight or near a bright, sunlit window, because the setting will wash out vivid hues in the scenery.
Don't: use HDR for quick, successive snaps.
Because HDR images are larger than their normal counterparts, it does take a few seconds for the camera to save each image. When looking to snap several images in succession, pass on the HDR function.

Do: use HDR in dim lighting, without flash.
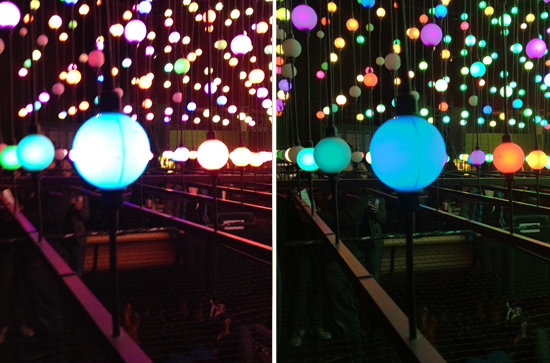
The normal photo of the light sculpture on the left is too bright; however, the HDR image balances the dark background and the bright lights of the sculpture. HDR is not available with the flash setting, so choose one or the other in dark locations.
To experiment with HDR, tap on the camera app. On the upper part of the screen, tap "HDR Off" once, so that you now see "HDR On." Take a photo as you would normally. The iPhone stores both the normal image and HDR image manually, which makes it fun to compare the differences. However, you can always change this option in "Settings" to save the HDR images only.


